I am a cake obsessive, based in West Sussex, UK.

I started off making cakes for family and friends before giving up a proper career in favour of playing with sugar full time. Having worked for two bakeries making their wedding and celebration cakes, I am now looking toward world domination with breaks for coffee and chat.

If you are interested in seeing future projects, enter your email address in the box on the right for updates.

To see my website go to: www.kasserina.com. You can email me on info@kasserina.com.

I also sell some sugarcraft items on Etsy. Please go to https://www.etsy.com/uk/shop/KasserinaHome?ref=hdr_shop_menu

Thanks for looking!

Thursday, November 14, 2013

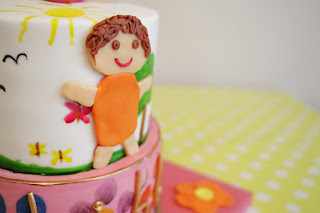
Thank you cake on behalf of the Tinies - November 2013

A cake for a very, very special lady… 
who we can never thank enough for all she's done for us.


Orange and raspberry top tier, double chocolate fudge bottom tier.
Little people, lettering and flowers made from modelling chocolate.


Sunday, November 10, 2013

Halloween Cake - November 2013


Halloween birthday cake for my god son.  
Snakes, bats and scary stuff.  
Check.


Bottom tier was citrus sponge with fresh raspberry buttercream.  
Middle tier chocolate fudge cake with dark chocolate buttercream.  
Top tier red velvet cake with cream cheese frosting.


Cut some graveyard shapes out to make a stencil to airbrush.
Came out a bit fuzzy, but doesn't really matter too much as the idea is that I build up layers and wanted them to look a bit misty.


Royal icing detail, then fondant pieces.


Add some bats and a spider once at the party and there's a scary halloween cake for the birthday boy.


Enough cake to feed about 120 people, might have over catered again, but actually it was quite a big party and I think we doled out about 60-70 slices.


Happy Halloween!

Mwah-ha-ha!


Sunday, October 20, 2013

1920s Vauxhall cake - October 2013


My first ever car cake.  This is a cake copy of Rob's vintage racing Vauxhall.  I couldn't have chosen a more tricky car to make as my first attempt at a car cake, but it's been a really good learning curve and it turned out pretty well. 

First step, bake A LOT of cake!


It's always really hard to show the scale of a cake.  Invariably my cakes are pretty big though.  I put the mug in to show scale here but I still don't think you can see it very well.

I baked 4 sheet cakes for this, with 9 eggs in each (so that's a 36 egg cake, the average Victoria sponge has 4 eggs in).  As with all sculpted cakes though, once I'd shaped it there was a lot of waste (which is currently in the freezer to make cake pops with later).  The finished cake is big, around 20 inches long.


Stacked the cakes with real chocolate buttercream filling. Sculpted the basic shape of the car body.  Put on several thin layers of buttercream (with extra melted chocolate added so it would cool to be fairly firm and help to support the structure of the cake).  

Finessed the shaping of the body.  Added modelling chocolate walls to the side of the car for extra strength.


Covered in fondant.

My new favourite is the Carma Massa Ticino Tropic fondant.  It's really elastic, so doesn't dry and go scaly, but tastes better than many of them.  As far as I know, you can only buy it from Town and Country Foods in the uk right now though, at £49 per 7kg with a minimum £80 order (but free next day delivery which is very handy).


Cut out seating area and used modelling chocolate to make the interior walls.


Built a base and support from foam core sheets.


Glued cake card to base.


Made wheels...


Radiator...


and fenders out of modelling chocolate (fenders had card and dowel supports inside)


Add bits and bobs


(Please excuse the corn flour on the seats that hadn't had time to disappear when I photographed it)
Delivery of enormous cake to birthday boy!

And here's the original...


For a much better lesson than this on how to make a car cake, 
have a look at Mike McCarey's tutorial on crafty.com. 
Well worth looking at, the man is a genius!

...

P.S. Post party car carnage!


Sunday, October 06, 2013

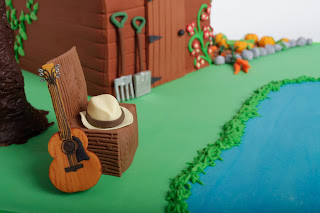
Manland / Garden Shed - October 2013

Inspired by my husband and his visceral need for a shed.  
That's his hat and guitar (but the garden produce is more me than him).


Friday, September 27, 2013

Macmillan coffee morning cake - September 2013


Chocolate fudge sponge with vanilla buttercream.

Bit annoyed with myself as used a very tasty, but slightly unstable sponge and forgot  (it was 1am and had been a long day) to use some dark choc ganache as a crumb coating around the outside to stabilise the cake before I put fondant on it.  As you can see the cake settled a bit overnight as a result.  Doh!

Nevermind, I'll remember next time!

Currently up for auction to raise money for Macmillan Nurses.  Hopefully it'll make a few extra £'s.

Thursday, September 26, 2013

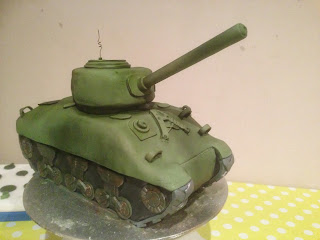
Sherman Tank - September 2013


So, here're the construction snaps:

Randomly shaped cakey bits on the base board, glued down with buttercream.


Covered with fondant.


Then green royal icing scrub, brown piping gel mud and cookie crumb earth.


Airbrushed to give it all a bit of tonal definition.


Meanwhile, carve the cake into a tank shape (I chose a Sherman and had a look on-line to see what they looked like), crumb coat and cover with fondant.  

You need a fairly firm cake for this, if it's too soft you wont be able to carve it well enough and it won't support itself.


Carve and cover turret separately.  Glue turret onto main tank body with royal icing.

Cover a sturdy straw with fondant stuck down with edible glue.  Allow to harden.


Start to add fondant detail.  

You need something sturdy to take the weight of the cannon barrel.  I used a wooden skewer, then some narrow straws split to fit inside each other and pushed these into the cake quite a long way to allow for leverage.


I slipped the barrel over the narrow straws and used edible to glue to anchor it.


For the tracks, I made a chevron design.


I glued the tracks on and dusted the tracks, wheels and gears with edible metallic dusting powders then airbrushed the whole tank.

The final details...


...then place the tank on the base and have a nice cup of coffee.